The easiest origami models are diplayed in pictured diagrams. They are a step by step instruction on how to fold a model beginning with a square of paper. Each step shows the model in its current state and displays lines that indicate the required mountain and/or valley folds to complete the step. There are also various symbols that indicate basic folding techniques. These symbols are based on the Yoshizawa-Randlett system and should be  reviewed. I won't provide a link as I have learned this system from various places and a simple search will be adequate.
 reviewed. I won't provide a link as I have learned this system from various places and a simple search will be adequate.
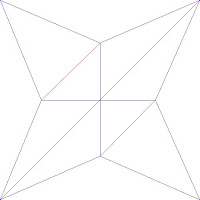
Some origami models are based only on mountain and valley folds. What I mean by this is there is no order of folds or pictures of steps. These models are folded by crease patterns or CPs. A CP is a drawing of the folds required to finish the model. The picture to the right has both a crease pattern and a diagram of an origami crane. Most crease patterns are not this descriptive and only provide instructions for the base of the model.
A base is a stepping stone for any origami model. For some models like the crane, a base is a starting point to save time. An author might say, "Start with a bird base." This allows the model creator to focus on the specifics of their model instead of basic folding instructions. When folding a crease pattern, the base is an intermediate step that represents the completion of the CP. The base will not necessarily look like the final model, but it can be shaped into it. This allows for some creativity and personalization of the model.


